
Dealing with pelvic discomfort can feel overwhelming, but learning how to use pelvic floor massage tool can be a game-changer for finding relief. You’re in good company if you’ve got a tool and are wondering where to start. This pelvic floor massage guide is here to walk you through each step with care, helping you use these pelvic floor therapy tools to ease tightness, soothe discomfort, and boost your overall well-being. Your pelvic floor — the vital muscles supporting your bladder, uterus, and bowels — deserves gentle care and attention. Let’s explore how these tools can help you feel more comfortable and empowered in your pelvic health journey—and how it fits into a broader understanding of women’s pelvic health.
Try the interactive massage guideTable of Contents
- Key Takeaways for This Guide
- Understanding Your Pelvic Floor
- Why Use Pelvic Floor Massage Tool?
- Choosing the Right Tool
- Preparing to Use Pelvic Floor Massage Tool
- Step-by-Step Guide
- Common Mistakes to Avoid
- Red Flags: When to Seek Professional Help
- Interactive Pelvic Floor Massage Tool
- Frequently Asked Questions
- Conclusion: Your Path to Pelvic Health
Key Takeaways for How to Use Pelvic Floor Massage Tool
- Consult a Professional First: Before starting, speak with a doctor or pelvic floor specialist to confirm the tool suits your needs.
- Prioritize Hygiene & Comfort: Always clean your tool thoroughly, use ample water-based lubricant, and choose a comfortable position.
- Start Gently & Listen to Your Body: Apply light pressure, explore slowly, and stop if you feel sharp pain or discomfort.
- Focus on Relaxation & Breathing: Pair the massage with deep, calming breaths to help muscles relax and release tension.
- Consistency is Key, But So Is Patience: Regular, gentle use over time yields results, but healing takes time.
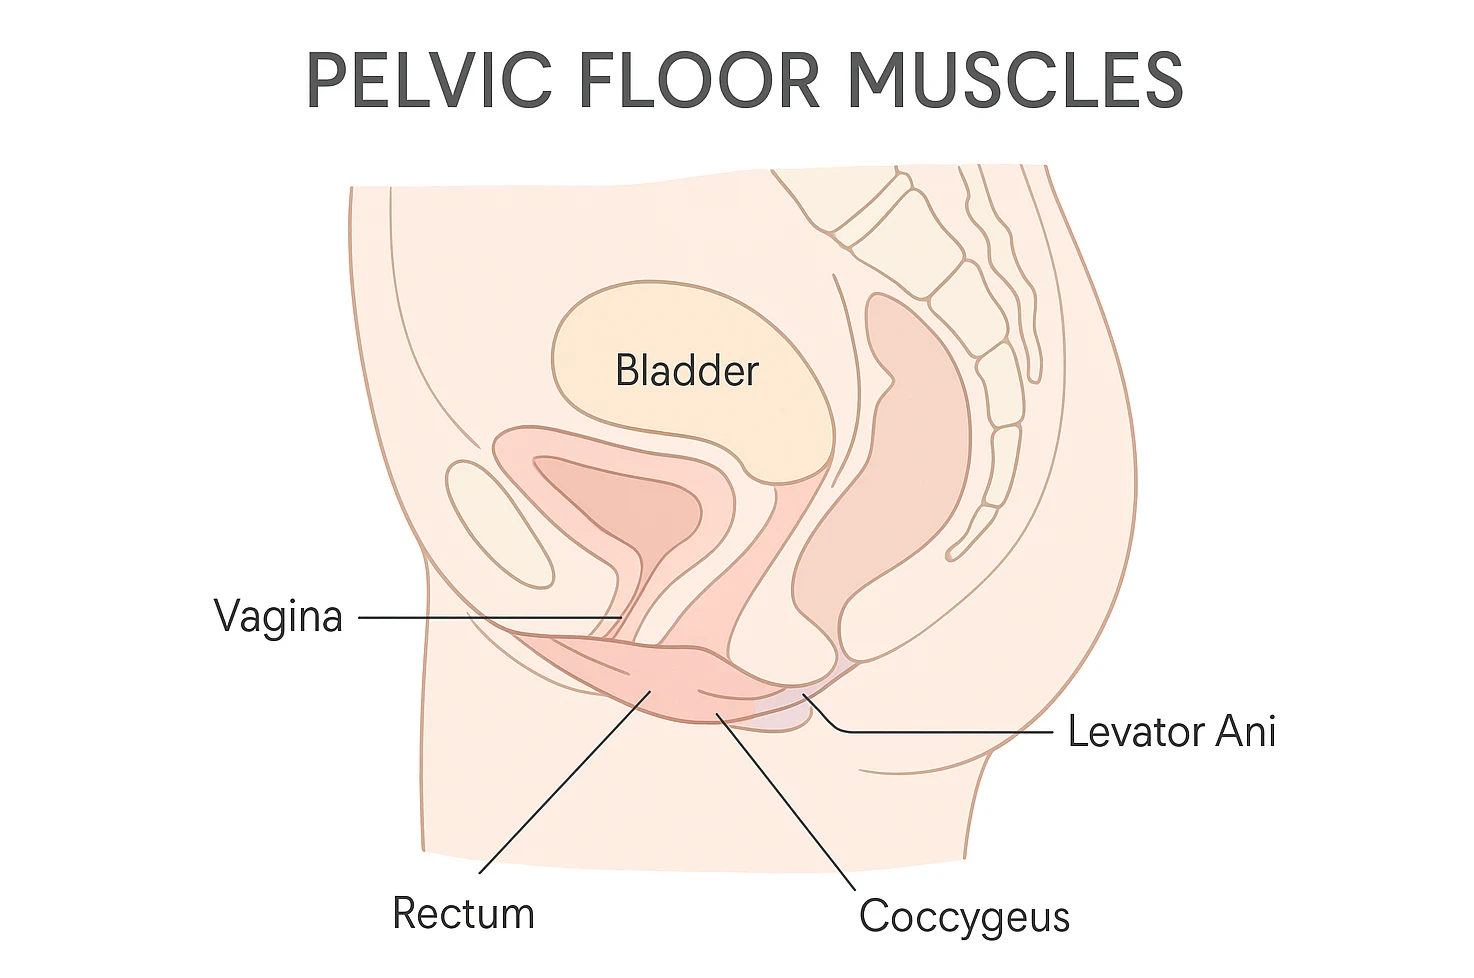
Understanding Your Pelvic Floor: A Quick Overview
Before you jump in with a pelvic floor massage tool, let’s get to know your pelvic floor. Picture a supportive hammock of muscles at the base of your pelvis, holding up your bladder, uterus, and bowels. These muscles are superstars, helping with everything from bathroom control to sexual health and childbirth. But things like stress, childbirth, surgery, intense workouts, poor posture, or chronic pain can make them tight or sore. When that happens, you might notice pelvic pain, discomfort during intimacy, or issues with bowel or bladder function. This guide can help you learn to use a tool to gently support muscle relaxation. Want to add some strengthening moves to your routine? Check out our guide on pelvic floor exercises for post-pregnancy recovery.
Why Use Pelvic Floor Massage Tool?
So, why use a pelvic floor massage tool? These internal massage tools are designed to reach pelvic muscles that are hard to access with fingers alone, offering a pathway to relief. Here’s why they’re worth trying:
- Relieve Muscle Tightness: These tools may help release tension and support comfort.
- Soothe Pelvic Pain: For conditions like vaginismus or endometriosis, gentle massage may help reduce sensitivity in tender areas over time, but consult a healthcare professional for personalized advice.
- Support Postpartum Healing: After giving birth, these tools may support blood flow, help soften scar tissue, and aid recovery when used as directed and with professional guidance.
- Boost Flexibility: Using pelvic floor therapy tools regularly helps your muscles stay flexible, making daily movements or childbirth prep easier.
- Ease Stress: Pairing gentle massage with deep breathing calms both your body and mind, since pelvic muscles can hold onto emotional tension.
- Connect with Your Body: Working with these tools helps you tune into your pelvic health, spotting tight spots more easily.
“Learning to use a pelvic floor massage tool is about more than physical relief—it’s about feeling empowered to care for yourself.”
Educational only—these practices may help some people, but they’re not medical advice. Always consult a qualified clinician for personalized care.
For more pelvic health tips, check out The International Pelvic Pain Society. To nurture your overall well-being, try our evidence-based self-love practices.
Choosing the Right Pelvic Floor Massage Tool and Pelvic Floor Therapy Tools
Picking the right pelvic floor massage tool feels less daunting with this guide by your side. Most tools are made of medical-grade silicone—safe, smooth, and easy to clean. Here’s what to consider:
Pelvic Floor Therapy Tools: What to Consider
- Material: Choose medical-grade silicone for safety and easy cleaning.
- Size: New to this or dealing with tightness? Start small and thin, then size up when you’re ready.
- Shape: Curved tools hit specific spots nicely, while straight ones are more versatile.
- Features: Some tools have vibration for extra relaxation, great for issues like vaginismus.
A pelvic floor physical therapist can point you to the best tool for your needs. For a deeper dive, check out our guide on the best devices for pelvic floor exercise in 2025.
This post has affiliate links. We may earn a commission. Learn more.

Preparing to Use Pelvic Floor Massage Tool
Preparation makes all the difference. Here’s how to set yourself up for a safe, comfortable session with your pelvic floor massage tool:
Consult a Professional First
Before you start, talk with a doctor or pelvic floor specialist so you feel confident using the tool safely. They’ll confirm it’s a good fit, share techniques, and highlight areas to focus on or avoid—especially if you have unique health needs.
Maintain Strict Hygiene
Keeping things clean is crucial for safety and to avoid infections. Here’s what I do:
- Wash my hands well with soap before and after each use.
- Clean the tool with warm water and mild, unscented soap before and after every session.
- Rinse thoroughly to remove any soap, then dry with a clean cloth or let it air dry.
- Store it in a clean, dry pouch or bag.
Gather Your Supplies
Grab these essentials for a smooth, comfortable session:
- Your clean pelvic floor massage tool.
- Water-based lubricant (skip oil-based ones like coconut oil—they can damage silicone tools).
- A clean towel or tissue for cleanup.
- A mirror (optional, to help you see what you’re doing at first).
Create a Relaxing Environment
A cozy, calm space helps your muscles relax, making it easier to use your tool. Try these tips:
- Pick a private, quiet spot like your bedroom or bathroom.
- Keep the room warm to avoid tensing up.
- Add soft lighting or soothing music to set a relaxing vibe.
- Give yourself 10-20 minutes so you don’t feel rushed.
“Getting ready isn’t just a step—it’s a way to show yourself some love and care.”
Step-by-Step Pelvic Floor Massage Guide
This pelvic floor massage guide walks you through each step with ease and comfort. Take it slow, and let’s try these together:
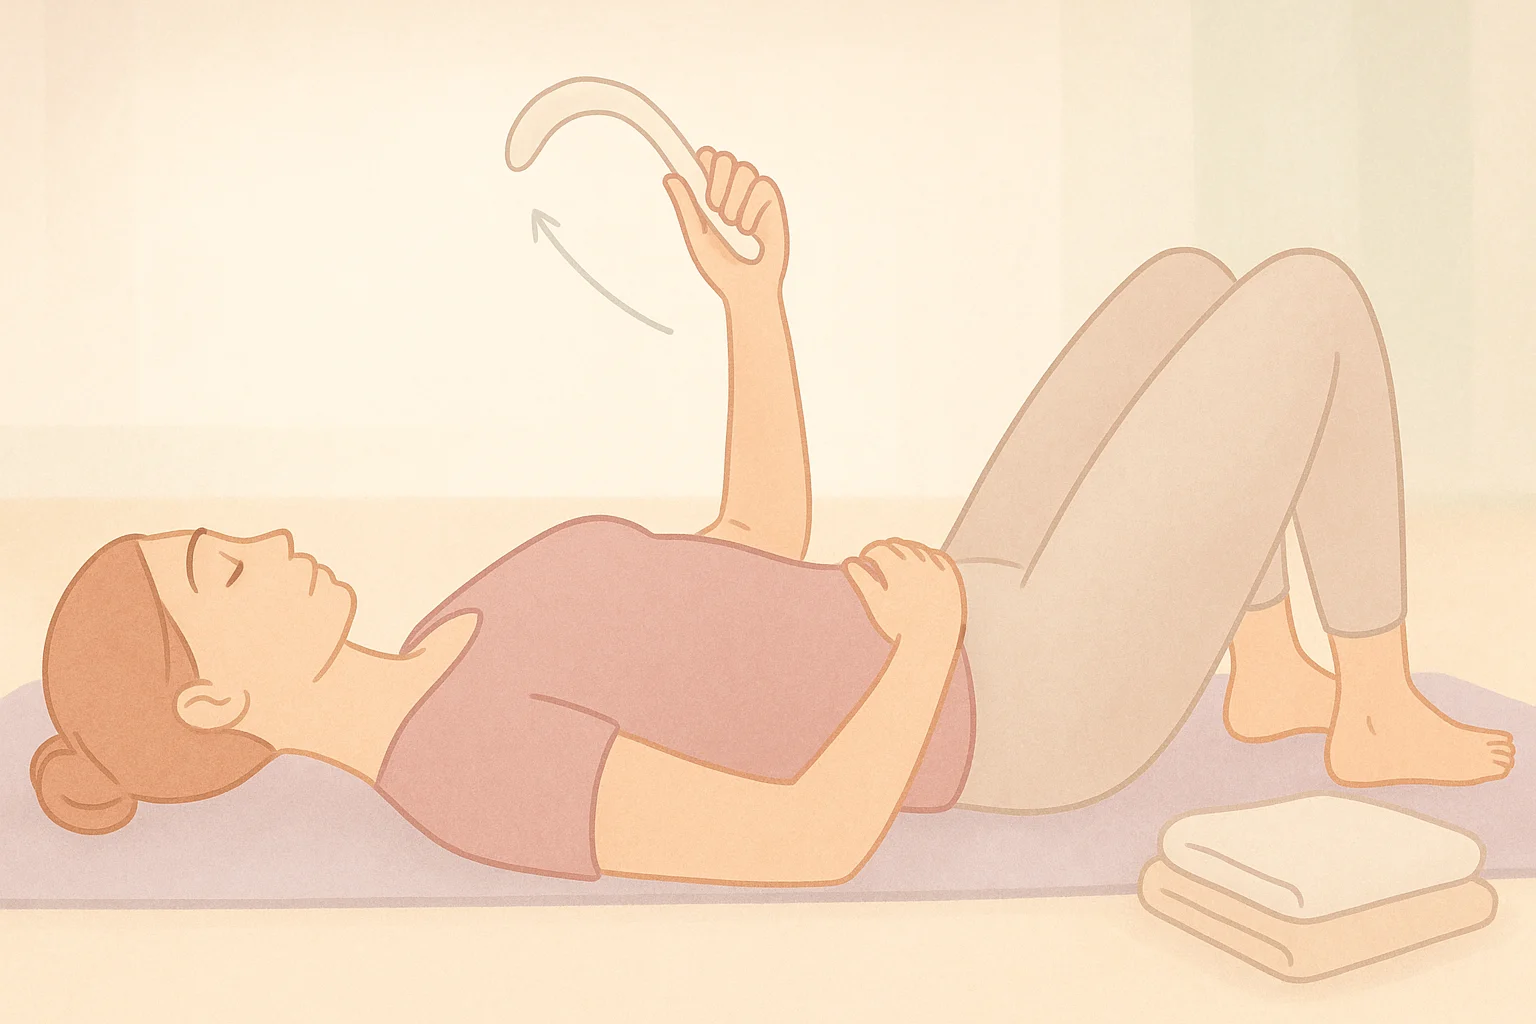
Step 1: Find a Comfortable Position
Start by finding a cozy spot that feels just right for you. Here are some ideas to explore:
- Lying on your back: Bend your knees, let them relax outward, and prop yourself with pillows for extra coziness.
- Squatting: Rest against a wall for support if that feels steadier.
- Sitting on the toilet: It might feel familiar, like using a tampon.
- Standing with one leg raised: Place a foot on a chair or low surface for easier access.
Play around to discover what feels best for your body.
Step 2: Apply Ample Lubrication
Apply a generous amount of water-based lube to the tool’s tip and, if needed, around your vaginal opening. Keep the lube nearby so you can reapply if things feel dry or draggy. This step’s a must for a smooth, comfortable experience when using the tool.
Step 3: Gently Insert the Tool
Take a deep breath and relax. Then, follow these steps:
- Hold the tool in your dominant hand.
- Place the lubricated tip at your vaginal opening.
- Inhale deeply, and as you exhale, gently guide the tool inside, angling it slightly toward your tailbone.
- Insert only as far as feels okay — often just past the opening for the outer muscles.
Step 4: Locate Tender Spots
Once the tool is inserted, gently feel for tight or sensitive spots, sometimes called “knots.” Try using the tool’s curves to explore different angles, picturing your vaginal opening like a clock face to find specific areas (like 3 o’clock or 6 o’clock).
Step 5: Apply Gentle Pressure
When you find a sore spot, go easy—press lightly and hold for 30-90 seconds, or try gentle circular motions or slow sweeps. If you feel sharp pain, stop right away; you’re aiming for a gentle stretch, not discomfort.
“Think of it like melting butter—slow, gentle pressure is the way to go.”
Step 6: Practice Breathing Techniques
Keep breathing deeply, letting your belly expand as you inhale and relaxing your pelvic floor as you exhale. Try to keep your jaw, shoulders, and glutes loose to avoid tensing up elsewhere.
Step 7: Know When to Stop
Your body knows best—stop if anything feels off, like:
- Sharp or worsening pain
- Numbness or tingling
- Increasing discomfort
Begin with short 5-10 minute sessions, easing into longer ones, up to 15-20 minutes, as you feel more comfortable.
Step 8: Aftercare and Cleaning
Wrap up your session with care, easing the tool out, washing it well with soap and water, and storing it safely. Take a quiet moment to notice how you feel—a little soreness is okay, but if discomfort sticks around, reach out to a professional.
Common Mistakes to Avoid When Using a Pelvic Floor Massage Tool
With this guide, using your tool feels approachable if you steer clear of these common slip-ups:
- Skimping on Lubricant: Use enough water-based lubricant to prevent friction.
- Rushing: Take your time to let your muscles relax.
- Too Much Pressure: Start light to avoid irritation.
- Ignoring Pain: Stop right away if you feel sharp discomfort.
- Skipping Hygiene: Clean the tool before and after use to prevent infections.
- Holding Your Breath: Deep breathing helps you relax.
- Skipping Expert Advice: Check with a pro to avoid mistakes.
- Using Oil-Based Lube: Stick to water-based lubes for safety.
Red Flags: When to Seek Professional Help
While these tools can do wonders, they’re not a replacement for professional care. Stop and reach out to a doctor or specialist if you notice:
- Sharp, shooting, or worsening pain
- Unusual bleeding
- Numbness or tingling
- Worsening symptoms (like urinary or bowel issues)
- Signs of infection (redness, swelling, discharge, fever)
- Feeling unsure or emotionally distressed
A pelvic floor physical therapist can offer personalized advice. If you’re recovering from surgery, our guide on sexuality after hysterectomy can provide extra holistic support.
Interactive Pelvic Floor Massage Tool
This tool helps you identify safe zones for pelvic floor massage techniques. Select a pelvic floor area to see guidance on whether it’s suitable for self-massage.
Frequently Asked Questions
Conclusion: Your Path to Pelvic Health
Taking time to learn to use a pelvic floor massage tool is a beautiful way to nurture your pelvic health. This pelvic floor massage guide is here to help you prepare with care, follow each step, and listen to your body to ease discomfort with these tools. Reach out to a specialist for extra support—here’s to nurturing your pelvic health, one gentle step at a time.